
Introduction
When managing Linux systems, particularly in environments with multiple users or applications, effectively controlling system resources is crucial. The ulimit command in Linux is an essential tool that allows you to set limits on the resources a user or process can consume. By configuring ulimit, you can prevent a single user or process from overwhelming the system, ensuring more stable and predictable performance. Understanding how to use the ulimit command, as well as how to configure limits in the limits.conf file is key to maintaining a well-functioning Linux environment.
What is ulimit in Linux?
In Linux, ulimit stands for “user limits,” a command that lets you control the system resources available to the shell and its spawned processes. ulimit in Linux can set various types of limits, such as the maximum number of open files, the maximum file size, and the maximum number of processes a user can create. These limits are vital in multi-user environments where resource allocation needs to be balanced across all users to prevent resource exhaustion. For example, if a user accidentally or maliciously spawns too many processes, it could deplete system resources, leading to a denial of service for other users. By setting appropriate ulimits, you can safeguard your system against such scenarios.

Use ulimit to Set and Change Resource Consumption Limits
Using the ulimit command in Linux, you can easily set and adjust the resource consumption limits on your system. This command allows you to define both soft and hard limits. The soft limit is the value enforced by the kernel for resource allocation, while the hard limit acts as a ceiling that the soft limit cannot exceed. For instance, you can use ulimit -n to set the maximum number of file descriptors a user can open. To set a soft limit, you would use a command like ulimit -Sn 1024, and for a hard limit, you might use ulimit -Hn 4096. By managing these limits, you ensure that no single user or process can consume excessive resources, which is particularly important in shared environments where resources are finite.
Changing Soft or Hard Limits in the limits.conf File
While the ulimit command is effective for temporary session-based adjustments, you may need to configure persistent limits that apply across reboots or to all users on a system. This is where the limits.conf file comes into play. Located in the /etc/security/ directory, the limits.conf file allows you to define both soft and hard limits for various resources, ensuring consistent enforcement across sessions and system reboots.
Open the limits.conf File
To modify resource limits globally, you must edit the limits.conf file. Begin by opening the file with a text editor like nano or vi. For instance, you could use the command sudo nano /etc/security/limits.conf to open the file. This file contains entries that specify the limits for different resources, structured as domain type item value. Here, the domain could be a username or group, type specifies whether it is a soft or hard limit, item represents the resource, and value is the limit itself.
Adjust the Limit Values
In the limits.conf file, you can set or modify the limits for various resources such as file size, number of processes, and more. For example, to limit the number of processes a user can run, you could add the following line: username hard nproc 1000. This sets a hard limit of 1000 processes for the specified user. Similarly, to restrict the maximum size of files a user can create, you might use: username soft fsize 50000, where the value is in kilobytes. By adjusting these values, you can fine-tune the resource allocation on your system to prevent any one user from monopolizing resources.
How to Use ulimit Command in Linux
To effectively manage system resources, it’s essential to know how to use the ulimit command in Linux. This command allows you to view, set, and modify the limits for various system resources in real-time.
Detailed Limit Report
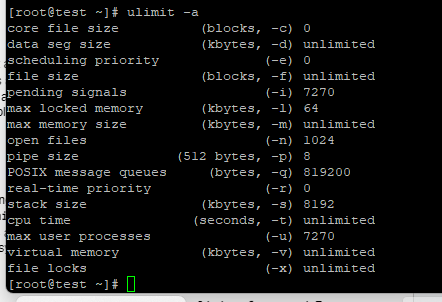
You can use ulimit -a to get a detailed report of all the current limits set for your user session. This command outputs a list of all resource limits, including file size, process numbers, and memory usage. It provides a comprehensive overview that is crucial when diagnosing system performance issues or planning resource allocation.
Limit Process Number
To prevent any user from creating an excessive number of processes, which could lead to system instability, use the ulimit -u command. For example, ulimit -u 2000 sets the maximum number of processes a user can create to 2000. This limit is vital for ensuring that no single user can overwhelm the system’s process table.

Limit File Size
To control the maximum file size a user can create, you can use the ulimit -f command. For instance, ulimit -f 100000 restricts the file size to 100MB. This is particularly useful in environments where disk space is a premium, and large file creations need to be controlled.

Limit Maximum Virtual Memory
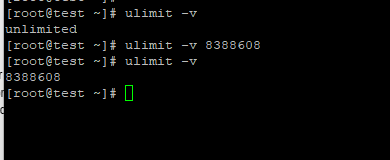
Virtual memory limits can be set using the ulimit -v command. For example, ulimit -v 8388608 limits the virtual memory to 8GB. This setting is crucial for preventing applications from consuming too much memory, which could lead to system slowdowns or crashes.
Limit the Number of Open Files
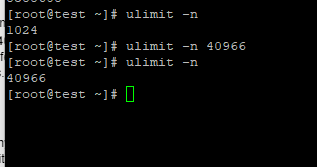
One of the most critical limits you can set with ulimit is the maximum number of open files, which you can adjust using ulimit -n. For example, ulimit -n 4096 sets the maximum number of open file descriptors to 4096. This is particularly important for applications that handle numerous file operations, such as databases and web servers.
Edit limits.conf file to Change Soft or Hard Limit
If you need to make persistent changes to the soft or hard limits for any resource, you should edit the limits.conf file in Linux. This method ensures that the limits you set will remain in effect across system reboots and user sessions. Follow these detailed steps to edit the limits.conf file effectively:
1. Locate the limits.conf File: The limits.conf file is typically located in the /etc/security/ directory. This file is where you define system-wide resource limits for users and groups. To access it, you’ll need root privileges, as it’s a critical configuration file. Open your terminal and use the following command to navigate to the file’s directory:
cd /etc/security/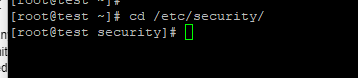
2. Open the limits.conf File: To edit the limits.conf file, you can use any text editor like nano, vi, or vim. Here’s how you can open the file using nano:
sudo nano /etc/security/limits.conf
Using sudo ensures you have the necessary permissions to edit the file. The file is structured with lines that define the limits for specific users or groups.
3. Understand the limits.conf Syntax: The limits.conf file uses a specific syntax to define limits:
<domain> <type> <item> <value>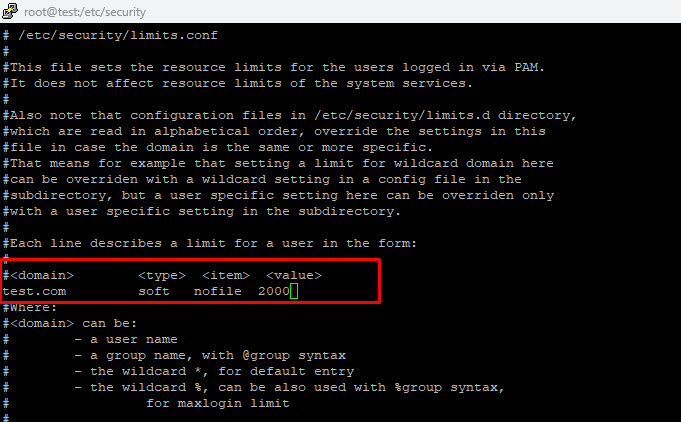
- Domain: Specifies the user or group to which the limit applies. For example, * applies to all users.
- Type: Indicates whether the limit is a soft or hard limit.
- Item: Specifies the resource being limited, such as nproc (number of processes) or nofile (number of open files).
- Value: The numeric value of the limit.
4. Set or Modify a Soft Limit: To set a soft limit, add a line in the limits.conf file using the soft keyword. For example, to set a soft limit on the number of processes (nproc) a user can run, you would add:
username soft nproc 2000
This command sets the maximum number of processes for the specified user to 2000. The soft limit is the threshold that the user will operate under normally.
5. Set or Modify a Hard Limit: To enforce a strict upper boundary, use the hard keyword to set a hard limit. For example, to set a hard limit on the number of open files (nofile), you would add:
username hard nofile 4096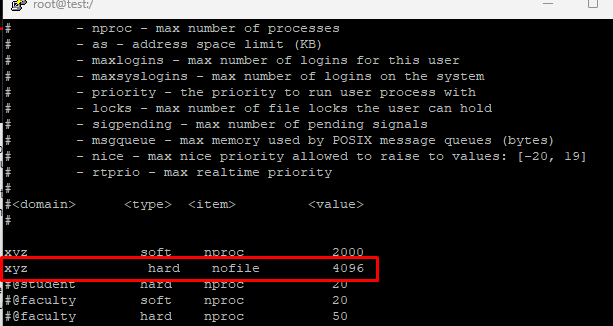
This sets a hard limit of 4096 open files for the specified user. The hard limit cannot be exceeded without superuser intervention, ensuring system protection.
6. Define Limits for All Users: If you want to apply a limit across all users on the system, replace the username with an asterisk *. For example, to set a global hard limit on the maximum virtual memory (as), add:
* hard as 8388608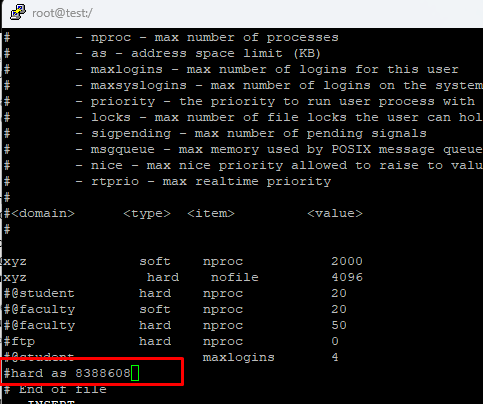
This command restricts the maximum virtual memory usage to 8GB for all users, which is crucial for maintaining system stability in environments with high resource demand.
7. Save and Exit the limits.conf File: After you’ve made the necessary changes, save and exit the editor. In nano, you can do this by pressing CTRL + O to save and CTRL + X to exit. If you’re using vi or vim, type :wq and press Enter.
8. Apply the Changes: The new limits will take effect the next time the user logs in. If you want to apply the changes immediately without requiring a logout, you can force the system to reread the limits.conf file by using the following command:
sudo sysctl -p
Alternatively, you can manually log out and log back in to apply the changes.
Also Read: Linux Watch Command – Examples And How to Use It?
Conclusion
Managing system resources effectively is a critical task for any Linux administrator, and understanding how to use ulimit is essential for this purpose. By using the ulimit command in Linux and configuring the limits.conf file, you can ensure that your system remains stable, efficient, and fair to all users. Whether you’re limiting the number of processes, controlling file sizes, or adjusting virtual memory, ulimit in Linux gives you the control you need to prevent resource exhaustion and maintain optimal system performance.


