Introduction
Do you want to manage your server or increase the security of the server? Have you ever thought about how specific tasks like email delivery, load balancing, and domain name resolution take place? Well, a DNS record is the center of all these activities. A DNS record consists of IP addresses, mail exchanges, nameservers, etc.
The Linux dig command is the tool that helps in the process of DNS query. Whether you want to request information or retrieve a particular query, a dig command in Linux is the right solution. The dig or domain information groper command is specifically available in Linux and macOS.
In this article, we will delve into the Linux dig command, including how to install it and how to use it. It’s essential to read the entire article to understand the dig command fully.
Install dig on Linux (Optional)
In case the ‘dig’ command is not readily available in your Linux-based system, there are simple steps you can follow to obtain the domain information groper command.
- The first step is to open the terminal window.
- Then we will check whether the dig command is included in the Linux system or not. Use the below command to ensure.
dig --version- Once you have confirmed that the dig command is not included, simply update the package repository with the below code.
sudo apt update- The package manager depends on the type of Linux distribution. If you use Debian-based Ubuntu, the below command will be invoked.
sudo apt install dnsutils- After using the above command, your dig installation is complete.
- You can now easily verify the dig command’s version through the code below.
dig --version- You must use a different command like the one below if you are using CentOS or the Redhat operating system.
sudo yum install bind-utilsDig Syntax
A Linux dig command is useful with proper syntax. We have mentioned the full syntax of the Linux dig command below.

Let us bifurcate the above dig command point by point.
- Dig: This is the command name used to start the utility.
- Options: This term is used to modify the behavior of the dig command. You can easily alter the output format through this term. Have a look at certain examples of options.
@server: The configured DNS server with the system is the default server that is poked when you have to do the DNS query.
With this option, you can mention the specific DNS server for query.
-t MX: This option is used when you want to send a query for mail exchange records.
-c class: This option is used to specify the DNS class.
-f filename: If you want to look for the list of queries from a particular file, then this option is very useful.
A special option, “-h,” is useful when you want to go through the complete list of options to modify the dig command behavior.
- Domain: This field marks the domain on which you want to unleash the query.
- Query_type: This is useful when you are specific about the DNS record type.
How to Use the Dig Command With Examples
A dig command in Linux can be used in a variety of ways to complete different tasks. We will go through each important task one by one.
- Basic query: dig example.com
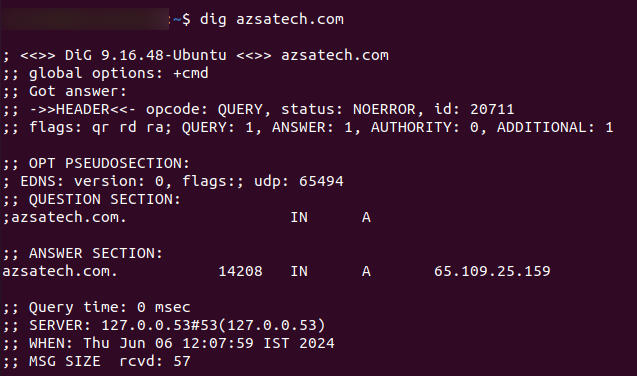
This command is used to obtain DNS records from the default DNS server, which is usually the one configured with the system.
- Specify DNS server: dig example.com @8.8.8.8
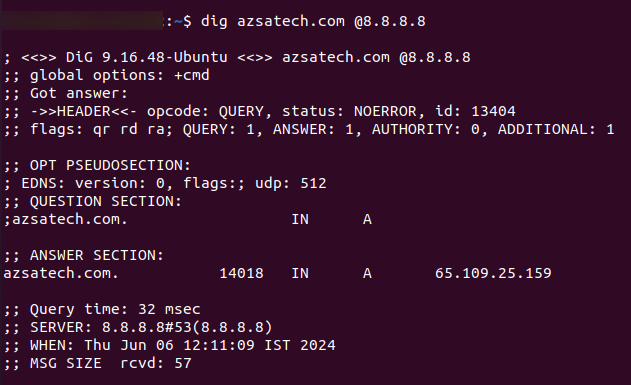
This command is useful when you have a particular DNS server in mind and want to retrieve information from the same.
- Reverse DNS lookup: dig -x 65.109.25.159
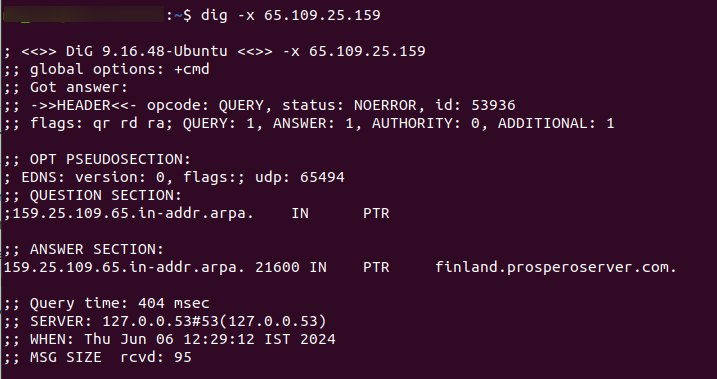
Looking up an IP address from a domain name is referred to as a domain lookup. Conversely, searching for the domain name by poking the IP address is known as a reverse DNS lookup. This command is beneficial for conducting a reverse DNS lookup.
- Querying multiple DNS servers: dig example.com @8.8.8.8 dig example.com @1.1.1.1

If there is a need to query more than one DNS server, then this option command can be invoked. This command is very time-saving when you have to compare queries from multiple DNS servers.
Batch Mode for Reading Host Names From a File
Batch mode is simply used to perform bulk tasks to mitigate time wastage. The batch mode can read the host names from multiple queries all at once. It makes the DNS lookups much easier for a large number of DNS servers through the dig command in Linux. We have curated simple steps to perform this action.
- To begin, create a text file and input each domain on a separate line, following the format shown below.
example.com
google.com
openai.com


- Further, write the below command to push the dig to read the listed hostnames. Your DNS query will be executed after the dig reads the hostnames.
dig -f hostnames.txt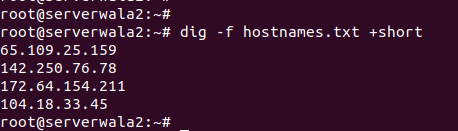
- Now all the queries will be listed in the terminal one by one.
Permanently Adjust Default Options
Are you fed up with specifying the options every time you want to query a DNS server? We have got the right solution for your problems. Follow the below steps and permanently adjust the default options in the Linux dig command.
- Open the terminal window.
- Now you need to reach your home directory using the below command.
cd ~- Use the command “.digrc” and create a configuration file.

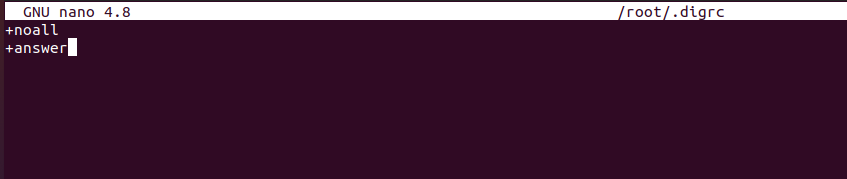
- A configuration file is a critical component that stores specific parameters and settings for a program. It provides a high level of customization and is typically created in the user’s home directory.
- Once you have created a configuration file, then simply enter the option in the below command format.
option_name: option_value
- The last step is to save the file and exit the terminal.
- This process will ensure the dig command in Linux uses the configuration file with the chosen options rather than the default one.
Also Read: List Process Linux – How to Check Running Processes?
Conclusion
In conclusion, the dig command in Linux proves to be an extremely useful tool that can effectively perform DNS queries and retrieve DNS records with ease. It allows users to access information from both default and specified DNS servers, conduct reverse DNS lookups, query multiple DNS servers simultaneously, and more.
The Linux dig command can be customized by implementing various options and arguments to meet specific requirements. Additionally, if Dig is not already present on your system, you can easily install it. By creating a configuration file, you can permanently modify default options. The dig command is an indispensable utility that can assist with DNS-related tasks and provide invaluable insights into the DNS infrastructure.