Introduction
Apache Maven stands out as a robust build automation and project management tool, playing a pivotal role in the toolkit of developers worldwide. Its ability to streamline and simplify the software development process has made it an indispensable asset in modern development workflows. If you’re an Ubuntu user keen on harnessing the full potential of Maven for your projects, this guide is tailored to your needs.
In the subsequent sections, we will guide you through a concise, four-step process, ensuring a seamless integration of Maven into your Ubuntu environment. This step-by-step walkthrough aims not only to help you learn how to install Maven on Ubuntu but also to provide insights into optimizing Maven for your specific development requirements. By the end of this guide, you’ll be equipped to leverage Maven’s capabilities efficiently, enhancing your software development experience on the Ubuntu platform.
Install Maven on Ubuntu with apt

The simplicity and efficiency of the Ubuntu package manager, ‘apt,’ make it the preferred method for installing Maven on Ubuntu. This package management system streamlines the procedure, making it accessible to novices as well as expert users. Follow these steps to effortlessly install Maven on your Ubuntu system.
Streamlined Installation Process
The ‘apt’ package manager automates the retrieval and installation of software packages, ensuring a hassle-free experience. This process is designed to simplify the installation of Maven by handling dependencies and configurations seamlessly.
Step 1: Update Package Information
Before installing Maven, it’s essential to update the local package index. Open a terminal and execute the following command:
sudo apt update
This command takes out the contemporary details about accessible packages, ensuring that the subsequent installation process includes the most up-to-date versions.
Step 2: Install Maven
Once the package index is updated, proceed with the Maven installation employing the below command:
sudo apt install maven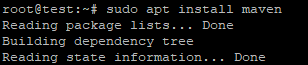
By executing this command, ‘apt’ will automatically download and install the latest version of Maven from the official Ubuntu repositories. The process takes care of any necessary dependencies, making it a user-friendly approach for those new to Maven.
Seamless Integration with System
The ‘apt’ package manager integrates Maven seamlessly into your Ubuntu system, ensuring that it is readily available for use in your projects. This straightforward installation method aligns with the Ubuntu philosophy of providing a user-friendly environment for software development.
Up-to-Date Software
Using ‘apt’ guarantees that you are installing the latest stable version of Maven available in the Ubuntu repositories. This ensures that you have access to the most recent features, bug fixes, and improvements in Maven without the need for manual intervention.
Package Management Benefits
The ‘apt’ package manager simplifies software management by handling updates, removals, and dependencies automatically. This approach saves users time and effort, permitting them to emphasize on their development tasks instead of managing the intricacies of software installations.
Customizability and Maintenance
The ‘apt’ installation method also offers the flexibility to customize Maven configurations based on specific project requirements. Additionally, as part of the Ubuntu ecosystem, Maven installations via ‘apt’ benefit from the system’s built-in maintenance processes, such as automatic updates and security patches.
Ensuring the Installation
After the installation is complete, it’s crucial to verify that Maven has been installed successfully. Open a new terminal window and run the following command:
mvn -versionThis command displays information about the installed Maven version, confirming that the installation was successful.
Install the Latest Release of Maven on Ubuntu

Step 1: Install OpenJDK
Maven relies on Java for its operations. Guarantee the presence of OpenJDK by executing the following command:
sudo apt install openjdk-11-jdkThis command not only installs OpenJDK version 11, the recommended version for Maven, but also ensures that all necessary components are configured to support Maven’s functionality seamlessly.
Step 2: Download and Install Maven
Navigate to the official Apache Maven website to acquire the latest binary tarball. Post download, extract the contents to your preferred location. Use the following example command:
tar -zxvf apache-maven-3.x.x.tar.gz -C /opt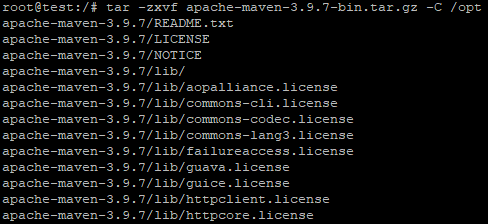
Make sure to replace ‘3.x.x’ with your downloaded version. This extraction process places Maven in the ‘/opt’ directory, ready for utilization in your development projects.
Step 3: Set Up Environment Variables
To make Maven universally accessible, configure environment variables through the modification of the ‘.bashrc’ file. Execute the following commands:
echo 'export PATH=$PATH:/opt/apache-maven-3.x.x/bin' >> ~/.bashrcsource ~/.bashrc
Substitute ‘3.x.x’ with your downloaded version. This modification ensures that Maven is seamlessly integrated into your system’s PATH, simplifying its invocation from any terminal window.
Step 4: Verify Maven Installation
After the installation, it is wise to verify its success. Open a new terminal window and run:
mvn -version
A successful installation will display comprehensive information about the Maven version and related details. This step ensures that Maven is not only installed but also operational, and ready for your development endeavors.
Also Read: How do you start, stop, and restart Apache in Ubuntu?
Conclusion
Congratulations on successfully installing Apache Maven on your Ubuntu system! You’ve now integrated a powerful tool that not only efficiently manages project builds but also opens the door to a wealth of features and plugins. Dive into Maven’s extensive feature set, exploring the Project Object Model (POM), conventions, and the ecosystem of plugins tailored to streamline tasks across various domains. Leverage Maven’s extensibility to customize your development environment and stay informed about updates and best practices through official documentation and community engagement.
Consider adopting a mindset of continuous learning and improvement. Explore advanced Maven topics, engage with the dynamic Maven community, and tailor your usage to emerging trends in software development. With Maven as your ally, you’re poised to enhance productivity, streamline workflows, and, most importantly, enjoy a seamless and efficient coding experience. Happy coding!