Introduction
Programming languages are the backbone of any application. But do you know that the performance of a language regarding various tasks depends on the usage of functionalities? Yes, whether it is the calculations or the flow of the application, functionalities do it all for the programming languages.
The problem occurs when the in-built functionalities of a language are not sufficient. The only solution to this issue is to install a library. These libraries offer a wide variety of functionalities to the user. In this whole story, you might have noticed that the working of the application heavily depends on the functionalities that eventually come from libraries. Pip3 is a tool that lets the user install these libraries in a programming language environment.
We are going to teach you how to install pip3 for different operating systems. Let’s start with some more explanation of pip3, and then we will move forward to the installation process of pip3 on Windows, Mac, and Linux.
Explain pip3
What do you think is the apt solution if someone wants to buy the best cold coffee in town in the shortest period? Getting the coffee themselves or ordering it from a food delivery application? We believe that appointing a delivery guy is the fastest alternative. A pip3 tool is very similar to a delivery guy who can fetch libraries containing important functionalities. This tool is meant to power the programming language. The pip3 tool is installed in different ways on Windows, Mac, and Linux. We will read about each of them in the next section on how to install pip3.
How Tricky is it to Install pip3?
Installation of the pip3 tool is very similar to stationing any other software or tool on the system. The only difference lies in the choice of operating system. Yes, each operating system has a different rule book for installing this amazing tool called pip3. Please go through the following sections to get detailed information about the same.
The Basic Requirements to install pip3
The most important thing to note here is that pip3 is a special tool for the installation of Python packages. So, to start the installation process, the user will have to set up Python on the system in the proper presence of the Python installer. The further steps will depend on the type of operating system you use, and we will discuss this part in detail in this article itself.
Is Your pip3 tool Already Installed?
Many times, it is seen that the tool is already present in the system. The proper way to check the installation of the pip3 tool is written below.
- Open the command prompt window.
- Write the command “pip –version” in the terminal window.
- If the pip3 tool is already installed, then the system will display the version. Otherwise, you will have to perform the function to install the tool.
How to Install pip3 on Windows?
The most basic step in the installation process is to download the latest Python version from https://www.python.org/downloads/. Once you have clicked the download button, a pop-up similar to the one below will appear.

Now, you will have to tick on the add option in the pop-up window to ensure that the Python version is added to the PATH variable in the system’s environment. The pop-up will guide you through further steps until the Python version is completely installed. Due to the default settings, pip is automatically installed at the end of the Python version download. In another common situation, you might encounter that only the Python version is downloaded while the tool remains out of the scenario. In such a situation, you will have to use the “get-pip.py” command to get pip3 on Windows. Verification is the last step of this process, and the command “pip –version” will present the tool’s details in case it is installed properly. Remember, the method explained above does not include the manual addition of pip. Rather, this method focuses on the auto installation of pip3 through the Python package.
How to Install pip3 on MacOS?
Python 3, the latest programming language version, is the usual combination to work with pip3 on macOS. Before installing it, a smart user should always check its availability on the system through the command “pip3 –version”. If Python 3 is not present in the system, then you can initiate the process with the following steps:
Install Homebrew Manager on macOS
You must use Homebrew, the package manager for macOS, to install Python 3. The command below will help you get the Homebrew package on your Mac.

Get Python 3 through Homebrew
Due to Homebrew being the most suitable package manager for Mac, you need to get Python 3 using the same manager. Use the following command to get the process done:

An important point to note here is that when you download Python 3, which is the latest version of Python, pip3 is automatically installed on Mac. So, the last step for you would be to check the version of pip through the “pip3 –version” command and confirm the completion of the process.
How to Install pip3 on Linux Distribution?
You can refer to the following commands for different Linux distributions:
pip3 on CentOS and Fedora
Use the following command if you want to install pip3 on Fedora, CentOS, or RHEL:

pip3 on Debian and Ubuntu derivatives
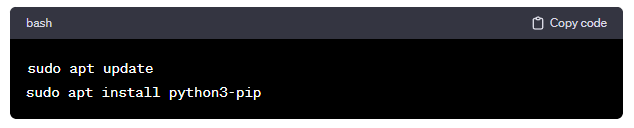
The Debian and Ubuntu derivatives need the following command for advanced package tool updates and Python 3 installation, along with pip3.
How To Configure pip3?
After proper installation of pip3, you need to look for configuration. The basic configuration options of this tool are almost the same for Windows, Linux, and Mac. We have included all the basic options for our reader’s convenience.
A. Configuration file address
- The location of the configuration file in Windows: “%APPDATA%\pip\pip.ini”
- The location of the configuration file in Linux and Mac: “~/.config/pip/pip.conf or ~/.pip/pip.conf”
B. Path separator style
Path separators (backslash and forward slash) play an important role in differentiating between levels of files and directories.
- Windows = “\” (backslash)
- Linux and Mac = “/” (forward slash)
Also Read: Linux Commands Cheat Sheet: Advanced Techniques
Conclusion
The pip3 tool serves as the delivery person for fetching essential libraries to power programming languages. Installing it varies across Windows, macOS, and Linux. On Windows, Python installation from the website often includes pip3. Otherwise, using get-pip.py fetches pip3. macOS users leverage Homebrew to install Python 3, automatically bringing pip3 along. Linux installation hinges on distribution, with Fedora, CentOS, and RHEL using “dnf or yum”, and Debian/Ubuntu relying on apt. Configuration settings, like file paths and separators, differ slightly across these platforms. Ultimately, pip3 stands as a crucial tool for effortlessly accessing diverse functionalities that elevate programming languages and applications.